INSTRUCTIONS FOR DIFFERENT HAIR EXTENSION TECHNIQUES
Here you will find instructions for different hair extension techniques:
- Clip-In hair extension
- EasyTape, Luxury and European Tape Extensions
- EasyTape M Tape Extension
- Pre-bonded Nail Tip Hair Extension
- Micro Loop Extension
- Flip-In Extension
- Care Instructions for all Hair Extensions
DREAM COLLECTION® CLIP-IN HAIR EXTENSIONS
Dream Collection® Clip-On Hair Extension is the latest and easiest way of achieving longer, thicker hair. Dream Collection® Clip-On Hair Extension is made from real, top quality Remy hair. You can wash and treat the hair in the same way as you do your own. Clip-On Hair Extensions consist of sections of different sizes with one to four clips: You simply and easily attach the hair extensions to your own hair using the clips. The clips remain hidden under your own hair, completely invisible from the outside. It is easy to attach the clip sections by yourself. After a little practice, it should only take a few minutes to put them in. The clips should be taken off at night and reattached in the morning. The Dream Collection® Clip-On Hair Extension set is ideal for you to do yourself in the comfort of your own home.
How to apply Clip-In Hair Extensions
Required items:
- Clip-on Hair Extensions
- Comp
- Hair clips
Normally, an 8-pcs Clip-on set is needed for full head hair extensions. For increasing hair volume, you need a 4-pcs Clip-On set.
Start fixing the Clip-on extensions at the lowest part of the head, working from the back of the neck and moving gradually upwards. First make a side parting in the back of the neck, leaving about 2 cm between the hairline and the first layer of Clip-on extensions. Backcomb the parting from the root. You Using hairspray will help the Clip-on extensions stay put.

Place the widest part of the Clip-on extension to the root and close the clip by pressing.
Continue to affix the extensions in the same way for the top and the sides. If you want to wear your hair tied up, take note of hairlines. The narrower parts can be used on the sides to supplement the extension.
Washing the Clip-In Hair Extensions
- Fill the sink with lukewarm water and add shampoo intended for hair extensions into the water.
- Soak the hair for 10-15 minutes and wash carefully in the sink.
- Rinse the hair with cold water.
- Dry the hair and apply conditioner, which should be left in the hair.
- Comb the hair, starting from the tips and moving slowly upwards.
- Leave the hair to dry at room temperature.
- Wait until the hair is completely dry before shaping and combing the hair.
EASYTAPE®, LUXURY AND EUROPEAN TAPE EXTENSIONS
Dream Hair® Luxury Tape Hair Extensions
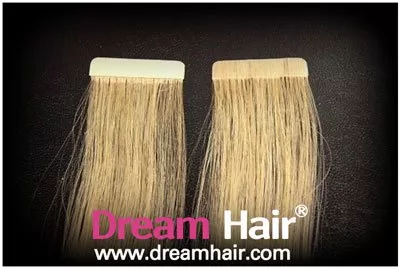
Dream Hair® Luxury Tape Extension is a hand-bonded tape extension made of the best hair quality. The hair is carefully selected, non-tangling 100% real human Remy hair. Luxury Tape Extension has been made by hand, making it extremely durable and the silicone part is undetectably thin. The hair stays tightly in the silicone part without coming off. The width of the hair strip is about 90 cm. Supertape 12 mm or Vapon tape 12 mm are suitable for attachment. You can cut the band to the sizes you require.
Preparation of the tape sections
- Cut the tape hair band into sections roughly 4 cm wide. Cut two sections of equal width, because they are attached against each other.
- Clean the silicone surface carefully, for example, with GH stripping liquor and then with warm water so that it is completely clean before attaching the tape to it.
- Dab the sections and silicone surfaces with a towel and then wait for them to dry completely.
- Place the sections on a table with the silicone surface facing up.
- Attach the SuperTape or Vapon Tape adhesive tape directly from the roll to the silicone surface. Ensure you do not touch the silicone surface or the adhesive surface of the tape with a finger. Set the tape so that it aligns with the upper edge of the silicone part. It does not matter if the tape runs over the edge in either direction.
- Cut the tape shorter at both ends so that it is the same length as the silicone part.
- Fix the tape tightly to the silicone surface, squeezing it down hard.
- Using the same method, continue to make more sections of the same size.
Attachment of tape extensions
- Wash and dry the hair before attaching the tape extensions. The hair must be completely clean and free from grease and conditioner.
- Start attaching the sections from the nape of the neck.
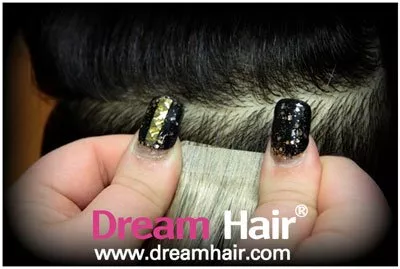
- Make a parting crosswise. Remove the white protective tape from the ready tape section. Attach the hair section to your own hair at the root of the parting.
- Lift the attached section up so that the tape side comes into view.
- Remove extra own hair from the tape.
- Attach another section of the same width onto the tape section, so that the adhesive surfaces are facing each other with your own hair in between.
- Stick the two tape sections together, squeezing hard to ensure a firm bond.
- Using the same method, attach the other sections to different areas of the head.
- The extension is complete!
Washing and care of tape extensions
- Keep the hair extensions clean. We recommend washing the extensions once or twice a week with lukewarm water.
- Wash the hair normally with shampoo intended for hair extensions.
- Apply condenser intended for hair extensions to the middle and the tips of the hair extensions. Do not apply condenser to the tape sections of the extension.
- Allow the hair to dry at room temperature. Shape and comb the hair once they have dried.
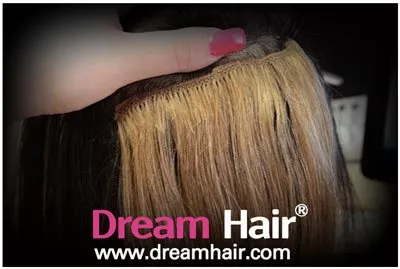
How to attach EasyTape®, Luxury or European Tape Hair Extensions
Required items:
- Tape extension hair
- Tail comb
- Hair clips
NOTE. When using Luxury or Euro tape extensions, you need SuperTape or Vapon Tape extension tape.
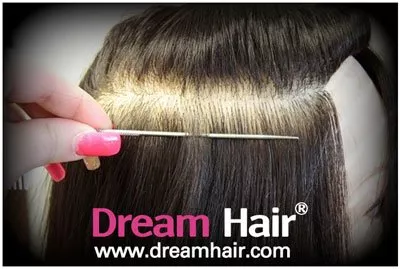
Start by making a side parting at the back of the neck, leaving about 2 cm between the hairline and the first tape extension layer. Remove the protections from the tape and select a section of the hair from the parting with a tail comb.
Fix the tape extension under the section, about 0.5-1 cm from the scalp. Leave an area of about 1 cm from the ends of the tape free of hair, as they will be used as adhesive surfaces pressed against each other.
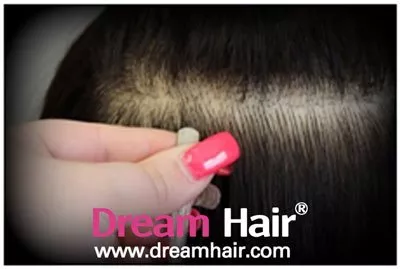
Select extra hair from the parting with a tail comb and fix another tape extension on top of the previous one, so that the adhesive surfaces are pressed against each other with your own hair between them. Press the extensions hard together, so that they stick to each other well.
Continue affixing the extensions in different areas in the same manner, paying attention to hairlines.

EASYTAPE® M TAPE EXTENSIONS
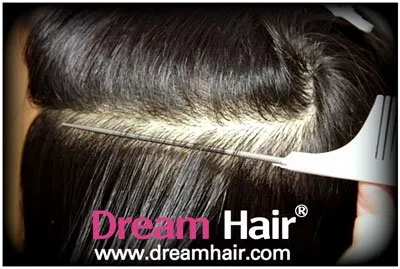
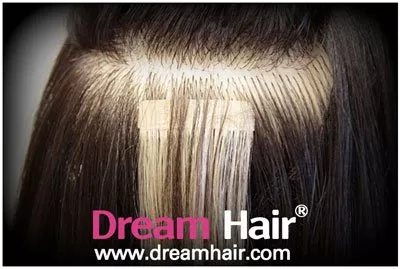
EasyTape® M is a new kind of tape extension similar to pre-bonded nail hair but attached with tape like a tape extension! The extension is really easy to attach: simply remove the protective film from the tape and fold the tape against itself so that your own hair stays inside the tape. The pre-bonded nail hair extensions are quick to attach, and you can do it yourself. You can strengthen the attachment by pressing the joint lightly with an extension iron or a straightener, which will help the extension stay attached longer. See attachment instructions in the video below. EasyTape® M is also well-suited to making highlights in your own hair.
How to attach EasyTape® M Hair Extensions
Required items:
- Tape extension hair
- Tail comb
- Hair clips
Start by making a side parting at the back of the neck, leaving about 2 cm between the hairline and the first tape extension layer. Remove the protections from the tape and select a section of the hair from the parting with a tail comb.

Fix the tape extension under the section, about 0.5-1 cm from the scalp. Leave an area of about 1 cm from the ends of the tape free of hair, as they will be used as adhesive surfaces pressed against each other.
Select extra hair from the parting with a tail comb and fix another tape extension on top of the previous one, so that the adhesive surfaces are pressed against each other with your own hair between them. Press the extensions hard together, so that they stick to each other well.
Continue affixing the extensions in different areas in the same manner, paying attention to hairlines.
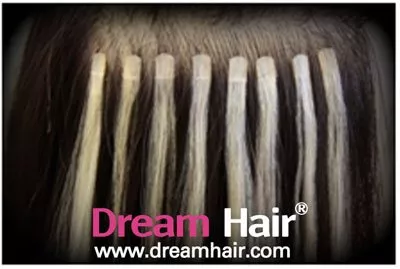
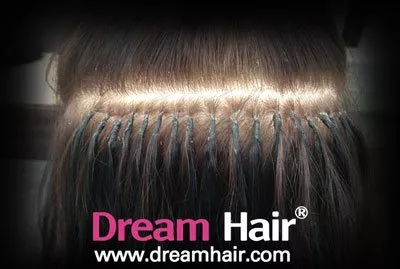
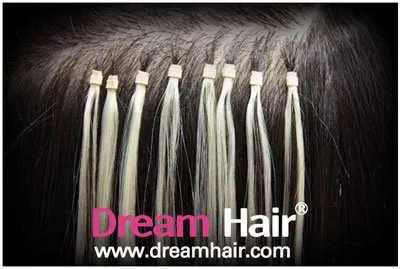
PRE-BONDED NAIL HAIR EXTENSIONS
In pre-bonded nail hair extensions, the hair sections have a pre-bonded nail tip of keratin. There are different lengths of nail tip sections, and they can have different quantities of hair. The nail tip sections usually weigh 0.5-1.0 g. The heavier the nail tip section, the more hair it has and the more expensive it is. If you use nail tip sections of 0.5 g, you have to use twice the number of sections to achieve the same end result as with nail tip sections of 1.0 g. Therefore, always check the weight and price of the section or bundle. This also affects the amount of work required to attach the nail tips.
The pre-bonded nail tip hair extension is heated with an extension iron so that the nail tip attaches to your own hair. A protective template is used to protect the scalp and the hair.
The keratin nail tip is easy to remove with the aid of a keratin nail tip remover and forceps. The keratin nail tip is moistened with the remover, after which the nail tip is broken with forceps. After this, the nail tip comes off easily without damaging your own hair. A nail tip removed in this way can be reused several times over without replacement.
How to apply Pre-Bonded Nail Hair Extension

Required items:
- Pre-Bonded Nail Hair Extensions
- Extension iron
- Plastic protectors
- Hair clips
- Finger protectors
For a full head of hair extensions, you need about 100-200 pre-bonded nails, depending on hair thickness. For increasing hair density, you need about 25-80 pre-bonded nails, depending on hair thickness.

Start from the back of the neck. Leave 1-2 cm between the hairline and the first layer of nail hairs.
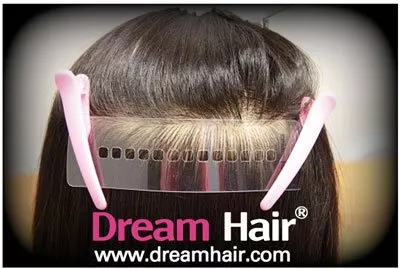

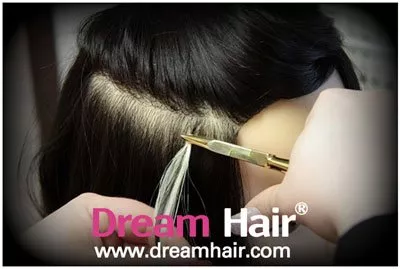
Insert the wide plastic protector on the parting and fix it with two clips. Using the tail comb, pull small sections of hair through the holes in the plate of equal thickness to the seals. For smaller sections, use the small plastic protector. From a place of your own choosing, take a section of hair that is equal in thickness to a seal and insert it through the hole in the protection template, then fix the template with a clip.

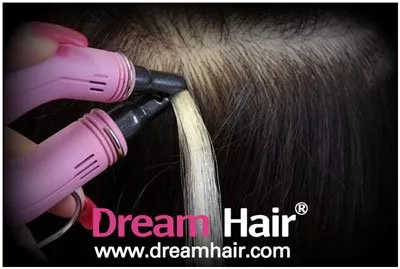
Insert a seal under a section of the hair, about 1 cm away from the scalp, so that the section of the hair is in a natural position.


Heat the seal carefully with an extension iron, so that the seal melts completely.
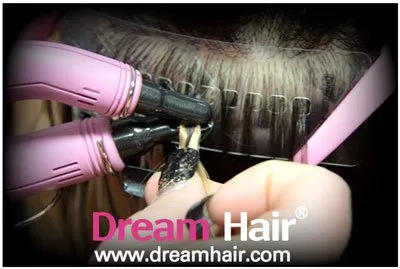

Shape the seal with your fingers so that it is dense and hard. Use finger protectors because a melted seal is very hot.
Continue to affix the extensions in different places in the same way, paying attention to hairlines.
Required items:
- Pre-Bonded Nail Hair Extensions
- Extension iron
- Plastic protectors
- Hair clips
- Finger protectors
For a full head of hair extensions, you need about 100-200 pre-bonded nails, depending on hair thickness. For increasing hair density, you need about 25-80 pre-bonded nails, depending on hair thickness.
Start from the back of the neck. Leave 1-2 cm between the hairline and the first layer of nail hairs.
Insert the wide plastic protector on the parting and fix it with two clips. Using the tail comb, pull small sections of hair through the holes in the plate of equal thickness to the seals. For smaller sections, use the small plastic protector. From a place of your own choosing, take a section of hair that is equal in thickness to a seal and insert it through the hole in the protection template, then fix the template with a clip.
Insert a seal under a section of the hair, about 1 cm away from the scalp, so that the section of the hair is in a natural position.
Heat the seal carefully with an extension iron, so that the seal melts completely.
Shape the seal with your fingers so that it is dense and hard. Use finger protectors because a melted seal is very hot.
Continue to affix the extensions in different places in the same way, paying attention to hairlines.
MICRO LOOP HAIR EXTENSIONS
How to apply Micro-Loop Hair Extension
Required items:
- Micro Loop extensions
- Micro Ring pliers
- Micro Ring hook
- Plastic clips
For full head hair extensions, you will need about 100-200 Micro Loop extensions. For increasing hair volume, you will need about 25-80 pcs, depending on hair thickness.
Start by making a side parting at the back of the neck, leaving about 2 cm between the hairline and the first Micro Loop extension layer.
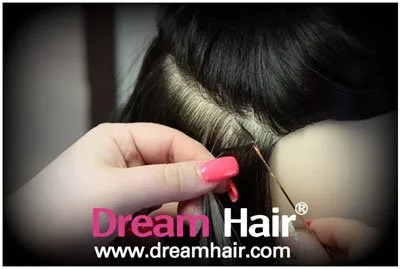
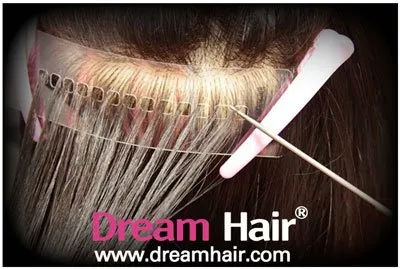
String the Micro Ring hook through the line of the Micro Loop and, using the hook, select a section of the hair of the same thickness as the Micro Loop.

String the line around the section of the hair and tighten it so it is about 1 cm from the hairline. Pull the section of the hair inside the Micro Loop with the line. Using the pliers, press the Micro Loop tightly around the section of the hair.
Continue fixing in different places in the same way, paying attention to hairlines.
Required items:
- Micro Loop extensions
- Micro Ring pliers
- Micro Ring hook
- Plastic clips
For full head hair extensions, you will need about 100-200 Micro Loop extensions. For increasing hair volume, you will need about 25-80 pcs, depending on hair thickness.
Start by making a side parting at the back of the neck, leaving about 2 cm between the hairline and the first Micro Loop extension layer.
String the Micro Ring hook through the line of the Micro Loop and, using the hook, select a section of the hair of the same thickness as the Micro Loop.
String the line around the section of the hair and tighten it so it is about 1 cm from the hairline. Pull the section of the hair inside the Micro Loop with the line. Using the pliers, press the Micro Loop tightly around the section of the hair.
Continue fixing in different places in the same way, paying attention to hairlines.
FLIP-IN HAIR EXTENSIONS
How to apply Flip-In Hair Extension
Required items:
- Flip-In Extension
- Tail Comp
Check that the Flip In extension line is of the desired length and tighten, cutting the line if necessary. The line can be changed if it breaks or becomes too short.
Affix the Flip In extension gradually to the head, so that the fixing line is twofold above the forehead and the hair extension is at the bottom.
Using the tail comb, raise the hair with the comb’s tail on top of the extension from the sides, from the back, and carefully from the point of the parting, so that your own hair covers the extension part’s line entirely.

Required items:
- Flip-In Extension
- Tail Comp
Check that the Flip In extension line is of the desired length and tighten, cutting the line if necessary. The line can be changed if it breaks or becomes too short. Affix the Flip In extension gradually to the head, so that the fixing line is twofold above the forehead and the hair extension is at the bottom.
Using the tail comb, raise the hair with the comb’s tail on top of the extension from the sides, from the back, and carefully from the point of the parting, so that your own hair covers the extension part’s line entirely.
CARE INSTRUCTIONS FOR ALL HAIR EXTENSIONS
Washing and care of hair extensions
- Keep the hair extensions clean. We recommend washing the hair extensions once or twice a week with lukewarm water.
- Wash the hair normally with shampoo intended for hair extensions. The shampoo is specifically intended for hair extensions, and it does not damage them.
- Apply the conditioner intended for hair extensions on them. In tape extensions, do not apply the conditioner to the tape sections.
- Allow the hair to dry naturally. Shape and brush the hairs once they have dried.
Sleeping, washing and swimming
- Plait the hair into two or three plaits before going to sleep, taking a shower or swimming.
- Do not sleep with wet hair; always dry the hair before going to sleep. Clip-On hair extensions should be taken off at night.
Colouring
- We do not recommend colouring hair extensions. Hair extensions have gone through a long manufacturing process, after which they are just the desired colour.
- If, however, you decide to dye them, darkening works best, but remember you are doing it at your own risk. Try first with a small quantity of hair.
- Do not use silver shampoo for hair extensions. If you do use silver shampoo, try first with a small section of hair. Hair that is left too long in silver shampoo may change colour to violet.
- Remember that all treatments, including colouring, are carried out at the customer's own risk! We do not offer refunds for any hair extensions that have been treated by the customer.
Popular Hair Extensions